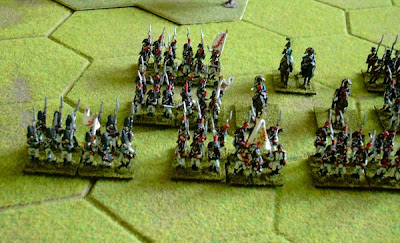
Barossa scenario for LFS
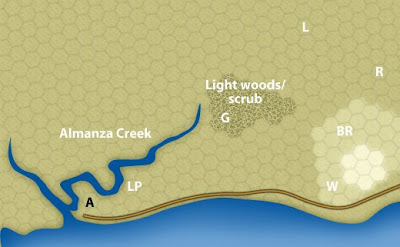
Allies OOB
CinC General Graham – Able Dav+1 LFS +2
Combined Light Battalion (Browne) – B class sk3
Combined Light Battalion (Barnard) – B class sk3
4x9pdr – B class
1st Brigade (Wheatley) – Solid Dav LFS +1
28th Gloucesters – B class sk1
67th Hamptonshire – C class sk1
87th Prince of Wales Irish – C class sk1
2nd Brigade (Dilkes) – Solid Dav LFS +1
1st Foot Guards – A class sk1
2nd/3rd Foot Guards (5 co’s) – A class sk1
95th Rifles (3 co’s) – B class sk3
Cavalry Brigade (Whittingham) – Solid Dav -1
KGL 2nd Hussars (2 sqdns) – B class
Spanish Dragoons (3 sqdns) – D class
Spanish:
CinC Count de la Pena – Poor/Cautious Dav –1
Independent Spanish brigade commander – Poor Dav -1
Spanish infantry regiment (2 btns) – D class sk0
Spanish infantry regiment (2 btns) – D class sk0
Brigade Commander – General Zayas – Poor Dav -1
Combined Grenadiers (1 btn) – C class sk0
Regiment de Principe (2 btns) – D class sk0
Regiment de Toledo (2 btns) – D class sk0
Regiment de Aragon (1 btn) – D class sk0
Graham starts the game at point G on march orders in march formation facing west and must proceed towards exit A until news of the French advance reaches him.
Whittingham’s cavalry contingent starts at point W on hold orders.
La Pena with Zayas’ brigade start deployed at point LP on hold orders.
The independent Spanish brigade starts deployed on Barossa ridge BR along with Brownes combined light battalion both on hold orders.
French OOB
CinC Marshal Victor – Bold/Able Dav +1 LFS +2
1st Brigade (Ruffin) – Solid Dav LFS +1
9th Legere (1 btn) - B class sk3
24th Line (2 btns) – C class sk1
96th Line (2 btns) – C class sk1
Provisional Grenadiers (1 btn) – B class sk1
6x9pdr Foot Arty - B class
2nd Brigade (Leval) – Solid Dav LFS +1
8th Line (2 btns) - C class sk1
45th Line (1 btn) - B class sk1
54th Line (2 btns) - C class sk1
Combined Grenadiers (1 btn) – B class sk1
Cavalry Brigade – Solid Dav -1
1st Dragoons (4 sqns) - C class
Ruffin starts deployed at point R with orders to attack and then hold the ridge, Leval starts at point L in march formation with manoeuvre orders to advance towards point A. Victor may start with either force or along with the cavalry which start on manoeuvre orders.
Briefing
Marshal Victor has heard of the approaching allied force on its way to Cadiz, he realises he could trap them and drive them into the sea. Count La Pena has ordered Sir Thomas Graham’s force to enter Cadiz. However, on Graham's strenuous objections to vacating a position that would result in both an exposed flank and rear, a force of four Spanish battalions and Browne's battalion was left to hold the Barrosa Ridge. In addition, three Spanish and two King's German Legion (KGL) squadrons of cavalry, under the command of Colonel Samuel Whittingham, were sent to flank this rearguard force on the coast track.
The game starts at the time of Victor’s attack on the Barossa ridge. The Almanza Creek is counted as difficult going and any unit crossing it is automatically disordered. The light woods/scrub are light terrain. The high point of the ridge is impassable.
Suggestions/guidelines for solo play.
Graham cannot change orders until word from the Spanish guerrilleros reaches him of the approaching French force.
Turn 1, roll a D6, 1-4, news reaches Graham and he may change his forces orders, 5-6, no news and he must continue towards point A. Turn 2, roll a D6, 1-5, news arrives, 6, no news, Turn 3 the courier automatically arrives.
Victor's plan rapidly developed momentum. Ruffin's advance sufficed to send the rearguard Spanish battalions running, leaving only Browne's battalion defending the ridge and, confronted by the French dragoons, Whittingham's cavalry decided to retire.
As soon as the allied force on the ridge spots Ruffin’s division roll a D6 for each force, on a 1-4 the independent Spanish brigade must retreat, on a 1-2 Browne’s battalion must retreat, otherwise they will both hold their ground. Repeat the rolls each following turn subtracting 1 from the die roll each turn. The Spanish will retreat each turn towards La Pena, Browne will rejoin the main allied force.
Throughout the battle, la Pena steadfastly refused to support his British allies. He learnt of the French advance at about the same time as Graham, and decided to entrench his full force on the isthmus defending the approach to the Isla de Leon. Learning of Graham's decision to engage the two French divisions, the Spanish commander was convinced that the French would win the day and so stayed in place; Zayas repeatedly asked for leave to go to Graham's support, but la Pena denied permission each time. On hearing that the British had prevailed, la Pena further declined to pursue the retreating French, again over-riding the continued protestations of Zayas.
Starting with turn 4, roll D12, on a roll of 10-12 La Pena gives in to Zayas to go to the aid of his British allies, roll a D12 again.
1-9, La Pena releases the independent brigade under Zayas’ command.
10-12, La Pena reluctantly leads the whole Spanish contingent himself.
Once a Spanish force is committed, stop rolling.
While Dilkes was moving on Ruffin's position on Barrosa Ridge, Barnard and the light companies advanced through the woods towards Leval's division. Unaware of the impending British assault, the French had taken no precautions and were advancing in two columns of march, with no forward line of voltigeurs. The unexpected appearance of British skirmishers caused such confusion that some French regiments, thinking there were cavalry present, formed square. These were prime targets for shrapnel rounds fired by the ten cannon under Major Duncan which, having made rapid progress through the woods, arrived in time to support the skirmish line.
Leval cannot change orders or formation until he spots an allied force.
To win, either side must drive the opposition from the table
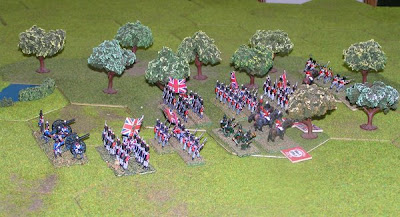
Graham receives word from the Spanish guerrilleros

Ruffin advances on the ridge
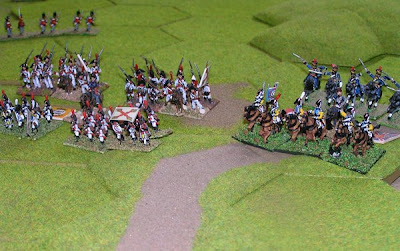
The Spanish and Whittingham abandon Browne
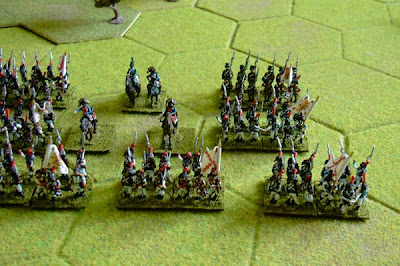
La Pena and the main Spanish force
